A well-installed toilet paper holder can make a big difference in your bathroom’s functionality and aesthetics. But where do you start? Let’s break down the process so you can achieve professional results without professional help. From measuring the perfect height to securing it firmly in place, we’ll cover everything you need to know for a smooth installation. Whether you’re a DIY novice or a homeowner looking to improve your bathroom, this guide will walk you through every step. This guide offers you a step-by-step installation process that ensures your toilet paper holder is both functional and stylish.
How Do You Choose the Right Toilet Paper Holder?
To choose the right toilet paper holder, consider the material, style, and space. Metal holders are durable but may rust. Plastic is affordable and rust-resistant but less durable. Wood offers a natural look but needs maintenance. Choose a style that matches your bathroom decor and ensure it fits your space.

What Tools Do You Need for Installation?
Before you start drilling, make sure you have the right tools to ensure a smooth and successful installation. Essential tools include a drill, level, screwdriver, measuring tape, and wall anchors for secure installation. Having all the tools ready saves time and frustration. For instance, a level ensures the holder is straight, while a stud finder helps locate the best spot on the wall. The right tools ensure your installation is quick, secure, and looks professional.
Let’s dive deeper into the tools you’ll need and why they’re essential:
- Drill: A drill is your go-to for making holes in the wall for the screws. If you’re dealing with particularly hard walls, consider using a drill bit set specifically designed for your wall type.
- Level: A level ensures everything is perfectly straight. Trust me, you don’t want your toilet paper holder dangling sideways—it’s a small detail that makes a big difference in the final look.
- Screwdriver: You’ll need this for tightening the screws once they’re in place. Make sure it’s the right size for the screws that come with your holder.
- Measuring Tape: Accuracy is key. Measure twice, drill once—it’s a handyman’s motto for a reason!
- Wall Anchors: These provide extra stability, especially if you’re installing in a spot without a wall stud. They’re like the heroes that keep everything in place.
- Stud Finder: If you’re aiming for a stud, a stud finder helps you locate it without the guesswork. It’s like having X-ray vision for your walls!
The right tools ensure your installation is quick, secure, and looks professional.
If you’re feeling extra prepared, here are a few bonus tools that can make the process even smoother:
| Tool | Purpose |
|---|---|
| Pencil | For marking drill spots and measurements. |
| Adjustable Wrench | For tightening bolts if your holder requires extra grip. |
| Cleaning Supplies | To wipe down the wall and holder for a polished finish. |
Having all these tools ready beforehand not only speeds up the process but also reduces the frustration of mid-task realizations that something’s missing. Plus, it gives you that satisfying feeling of being well-prepared—a feeling that’s hard to beat, especially when tackling a DIY project!
For a more detailed guide on installation, check out this resource: How to Install a Toilet Paper Holder.
How Do You Install a Toilet Paper Holder?
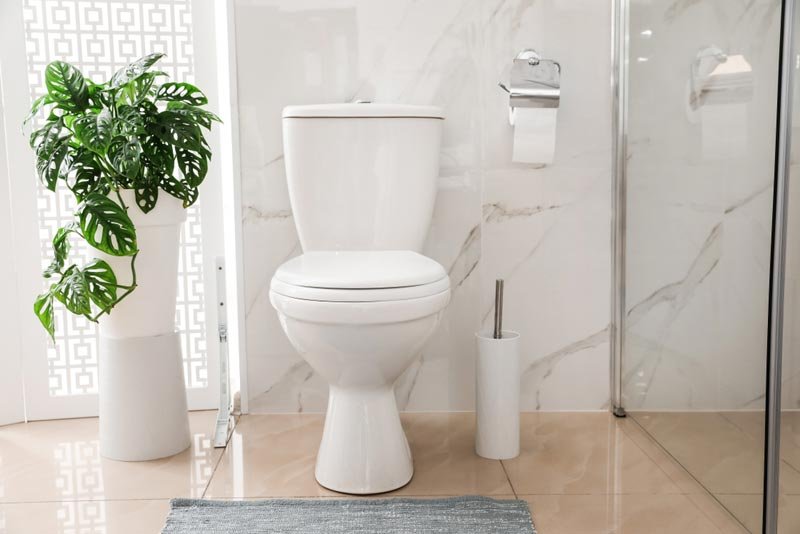
Installation might seem daunting, but with the right preparation, it’s a simple process. Start by measuring the ideal location, then secure the wall anchors, and finally attach the holder to the mounting bracket. Ensure the holder is 26 inches above the floor and 10-12 inches from the toilet for optimal comfort and accessibility. Following these steps ensures your toilet paper holder is installed correctly and securely.
Following these steps ensures your toilet paper holder is installed correctly and securely.
Let’s dive deeper into the installation process:
Selecting the Ideal Spot
Choosing the right spot is crucial. A toilet paper holder should typically be 26-28 inches above the floor, within easy reach from the toilet. Consider the size of your bathroom and who will use it. Adjust the positioning accordingly for homes with custom toilet paper needs or bulk storage. The proximity is key for smaller bathrooms—too far, and it becomes inconvenient.
Tools You Need for Installation
Gathering the right tools ensures a smooth installation. You’ll need:
- A drill
- Screws and anchors
- A level
- Measuring tape
- A pencil for marking the spots If your holder is designed for heavy-duty use, like wholesale toilet paper or tissue toilet rolls, anchors are especially important for extra stability.
Measuring and Marking for Precision
Accurate measurement is essential for a well-positioned toilet paper holder. Start by holding the holder against the wall at the ideal height (typically 26-28 inches from the floor). Using a level ensures the holder is perfectly aligned horizontally. Mark the points where the screws will go using a pencil. For those using larger rolls, such as bulk toilet paper rolls, consider placing the holder slightly higher or farther from the toilet to accommodate the extra size without obstructing the bathroom’s flow.
Once you’ve marked the spots, double-check the measurements. This step ensures that the holder will be easily accessible and centered, particularly if you’re installing a custom toilet paper holder or one designed for heavier use. Small adjustments now will save time later.
Drilling and Installing Anchors
Drilling comes next, and this is where careful attention is crucial. For drywall installations, use a standard drill bit to create small pilot holes at the marked locations. If you’re working with tiled walls, use a masonry drill bit to prevent cracking the tile surface. Drill slowly and steadily to avoid damage.
Once the pilot holes are ready, insert wall anchors if necessary. Anchors are critical for securing heavier holders, especially those intended for larger tissue toilet rolls or wholesale toilet paper. Push the anchors into the holes and lightly tap them flush with the wall using a hammer. If you’re working with a hard surface like tile, ensure the anchors are specially designed for harder materials to maintain long-term stability.
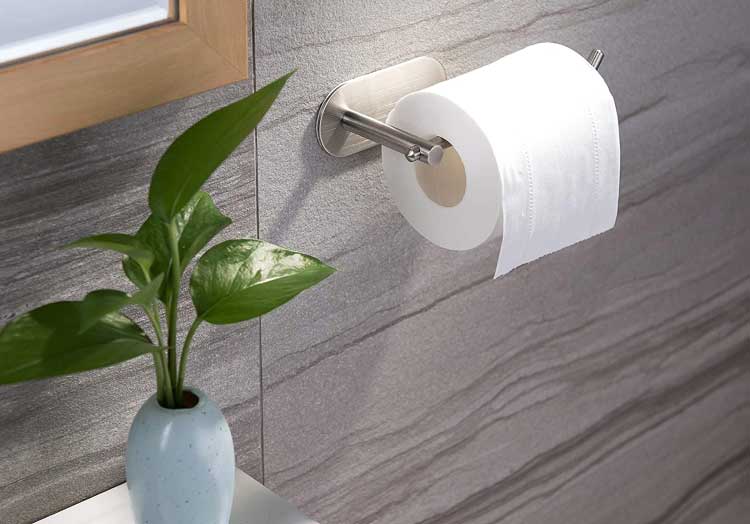
Fastening the Holder
With the anchors firmly in place, it’s time to attach the holder itself. Align the holes on the holder with the drilled spots on the wall, then fasten it securely using screws. Tighten each screw slowly, ensuring the holder remains level and doesn’t tilt. For heavier setups, like those intended for eco toilet paper or bulk toilet paper rolls, make sure to use screws that are strong enough to handle the weight.
As you tighten the screws, check for any wobbling or instability. Even if everything feels secure initially, it’s important to ensure the holder is sturdy enough to support frequent use. If it shifts or doesn’t sit flush against the wall, make adjustments by tightening the screws further or adding extra support.
Testing and Final Adjustments
Once everything is installed, it’s time to test. Place a roll of toilet paper on the holder and check its stability by pulling gently on the roll. The holder should remain firm, without any movement. If you’re installing bulk toilet paper rolls or heavier custom toilet paper options, test with the larger rolls to confirm the holder can manage the size and weight without sagging or pulling away from the wall.
If the holder wobbles or isn’t aligned correctly, loosen the screws and adjust it. Make sure it sits straight and that the paper rolls easily. For high-traffic areas, like commercial restrooms where wholesale toilet paper is used, this step ensures the holder will stand up to heavy use. After testing, if everything is in place and functioning properly, you can confidently say the installation was a success!
Additional Considerations:
- Tightening Properly: Double-check that all screws and bolts are tightened evenly. Over-tightening can damage the wall or the holder, so find that sweet spot.
- Test It Out: Once installed, give the holder a little tug to ensure it’s stable. You don’t want any unexpected wobbles down the line.
- Clean Up: Wipe down the area and the holder itself for a polished look. It’s the finishing touch that makes all the difference.
By following these steps, you’ll have a perfectly installed toilet paper holder that’s both functional and aesthetically pleasing. Happy DIY-ing!
What Are the Common Mistakes to Avoid?
Even with a good plan, installation mistakes can happen. Let’s look at the most common errors to avoid.
Incorrect placement and inadequate anchoring are top mistakes that can lead to the holder falling or being unstable. Use wall anchors if there’s no stud to prevent the holder from shifting over time. Avoiding these mistakes ensures your installation lasts longer and performs better.
Let’s dive deeper into the common pitfalls and how to steer clear of them:
- Incorrect Placement: Measure carefully to ensure the holder is 26 inches above the floor and 10-12 inches from the toilet. This placement ensures comfort and accessibility without being intrusive.
- Inadequate Anchoring: If you’re installing in a spot without a wall stud, use wall anchors to provide extra stability. This step is crucial to prevent the holder from shifting over time.
- Over-Tightening: Be cautious not to over-tighten the screws or bolts, as this can damage the wall or the holder itself. Find that sweet spot for a secure fit.
- Skipping the Level Check: A level ensures everything is perfectly straight. Trust me, you don’t want your toilet paper holder dangling sideways—it’s a small detail that makes a big difference in the final look.
Avoiding these mistakes ensures your installation lasts longer and performs better.
Additional Tips to Keep in Mind:
- Test It Out: Once installed, give the holder a little tug to ensure it’s stable. You don’t want any unexpected wobbles down the line.
- Clean Up: Wipe down the area and the holder itself for a polished look. It’s the finishing touch that makes all the difference.
By avoiding these common mistakes, you’ll ensure your toilet paper holder is both functional and aesthetically pleasing for years to come. Happy DIY-ing!
How Do You Maintain a Toilet Paper Holder?
Maintenance isn’t just about cleaning; it’s about ensuring the holder continues to function well. Regularly clean the holder and tighten any loose screws to prevent it from wobbling over time. A well-maintained holder adds to the overall cleanliness and functionality of your bathroom. Regular maintenance ensures your toilet paper holder stays sturdy and functional.
Let’s dive deeper into the maintenance process:
- Regular Cleaning: Use a mild detergent and a soft cloth to wipe down the holder. This keeps it free from dust and grime, ensuring it looks its best.
- Tightening Loose Screws: Over time, screws can loosen due to regular use. Periodically check and tighten them to prevent the holder from wobbling.
- Deep Cleaning: For tougher stains or mineral deposits, use a gentle cleaning product specifically designed for the material of your holder. Avoid harsh chemicals that might damage the finish.
- Inspecting for Wear and Tear: Keep an eye out for any signs of damage or wear. If you notice any, address them promptly to prevent further issues.
Regular maintenance ensures your toilet paper holder stays sturdy and functional.
Additional Tips:
- Schedule Maintenance: Set a reminder to perform maintenance tasks regularly, such as every 3-6 months, to keep your holder in top condition.
- Replace as Needed: If parts of the holder become damaged or worn out, replace them rather than trying to repair them. This ensures optimal functionality and appearance.
By incorporating these maintenance practices, your toilet paper holder will remain a reliable and stylish part of your bathroom for years to come.

Conclusions
Installing a toilet paper holder is a quick task, but attention to detail can make all the difference. Whether you’re outfitting a home bathroom with eco toilet paper for sustainability or installing a holder for bulk toilet paper rolls in a commercial setting, a proper setup ensures that it’s functional and durable for years to come. A little care and preparation will have you rolling smoothly.
If you are looking for toilet roll paper manufacturers and suppliers, we recommend checking our products.
We have more than 15 years of export experience and offer samples before order placement. To get a customized quote, Contact Us Now!
