¿Luchando con un soporte de papel higiénico obsoleto o tambaleante? No estás solo. Muchos entusiastas de bricolaje enfrentan el mismo desafío al renovar baños o simplemente querer actualizar los accesorios. ¿La buena noticia? Eliminando un soporte de papel higiénico a menudo es más simple de lo que parece, si conoce las técnicas correctas.
Esta guía lo guiará a través del proceso paso a paso para eliminar diferentes tipos de titulares de manera segura, ya sea que esté tratando con modelos tradicionales, empotrados o de cerámica. Cubriremos las herramientas esenciales, la resolución de tornillos despojados y la protección de sus paredes del daño, por lo que puede abordar este proyecto con confianza y evitar dificultades comunes.
Identificar el tipo de soporte de papel higiénico
Conociendo tu soporte de papel higiénico El tipo es el primer paso para un proceso de eliminación sin problemas, ya sea que esté actualizando o simplemente realice un mantenimiento del baño.
Cuando se trata de papel higiénico eliminación del titular, lo primero que debe hacer es identificar con qué tipo de soporte está tratando. Los diferentes titulares tienen diferentes mecanismos, y el uso del enfoque incorrecto puede provocar daños o frustraciones. Desglosemos los tipos más comunes y cómo reconocerlos.
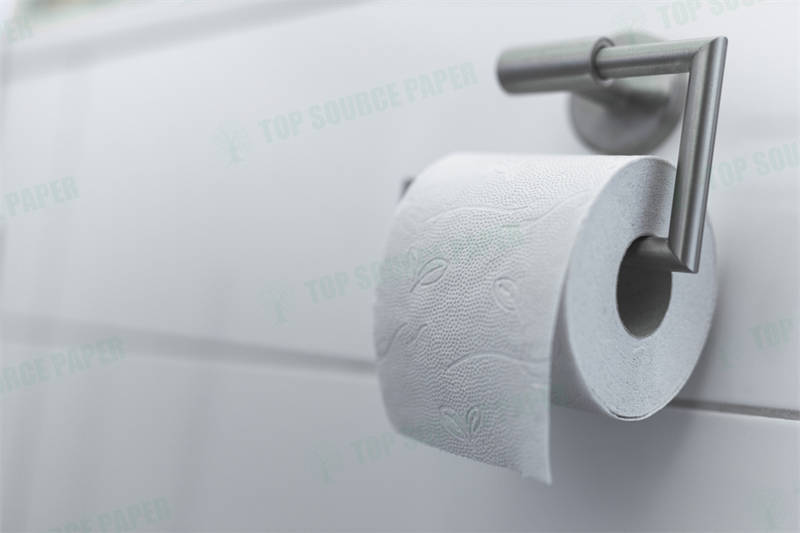
Portes de resorte tradicionales: identificación de características y problemas comunes
Estos son los más comunes Tipos de soportes para papel higiénico. Tienen un resorte dentro de la barra que mantiene la tensión en el rollo. Por lo general, verá un pequeño botón o sangría cerca de un extremo. Al presionar esto, libera la tensión, permitiendo que salga la barra. Los problemas comunes incluyen resortes oxidados o varillas atascadas, a veces un poco de WD-40 hace el truco.
Titulares de brazos pivotantes: cómo difieren y desafíos de eliminación específicos
Los titulares de brazos giratorios tienen un mecanismo de bisagra que permite que el soporte se abre. Busque un tornillo pequeño o un pestillo cerca de la bisagra. Estos pueden ser complicados porque los tornillos a menudo están ocultos o pintados. Es posible que se necesite un gentil pry con un destornillador de cabeza plana para acceder a ellos.
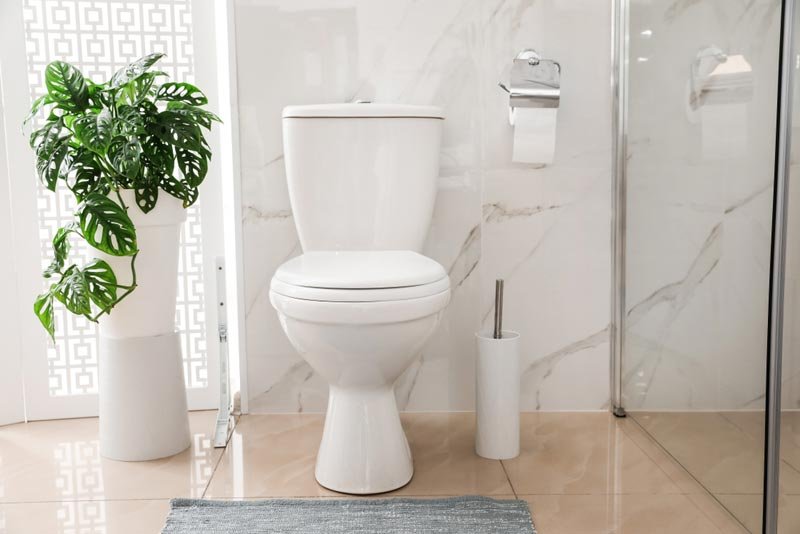
Titulares empotrados: reconocer sujetadores ocultos y métodos de montaje
Los titulares empotrados están integrados en la pared, dando un aspecto elegante pero haciendo Retire un soporte de papel higiénico un poco más involucrado. Por lo general, tienen tornillos ocultos detrás de la placa frontal. Es posible que deba sacar suavemente la cubierta con un cuchillo o un destornillador para encontrarlos.
Titulares de cerámica: consideraciones especiales para evitar agrietarse o astillarse
Los titulares de cerámica son elegantes pero frágiles. Si eres Eliminar un soporte de papel higiénico de cerámica sin daños, evite usar herramientas de metal directamente en la cerámica. Envuelva una tela alrededor del soporte antes de aplicar cualquier presión y trabaje lentamente para evitar grietas.
Tipos de soporte de papel higiénico y consejos de eliminación
| Tipo de soporte | Características clave | Método de eliminación | Problemas comunes | Recomendaciones de herramientas |
|---|---|---|---|---|
| Cargado de resorte | Botón o sangría en un extremo | Presione el botón, deslice la barra hacia afuera | Resortes oxidados, barra atascada | WD-40, mazo de goma |
| Brazo pivotante | Mecanismo de bisagra, a menudo tornillos ocultos | Desenroscar la bisagra, levantar el brazo | Tornillos pintados | Destornillador de cabeza plana, cinta de pintor |
| Empotrado | Al ras de la pared, la placa frontal oculta | Retire la cubierta, desenrosque | Placa frontal atascada | Herramienta de plástico, cuchillo utilitario |
| Cerámico | Material decorativo y frágil | Guente de cursi, protección de ropa | Agrietado, astillado | Paño suave, raspador de plástico |
| Magnético | Sin tornillos visibles, superficie lisa | Gira y tira | Residuo adhesivo fuerte | Pistola de calor (configuración baja), Goo se fue |
Una vez que haya identificado su tipo de titular y lo haya eliminado con éxito, puede considerar actualizar a una opción más moderna o ecológica. Muchos modelos más nuevos están diseñados para una instalación y eliminación más fácil, ahorrándole “una tonelada de molestias” en el camino.
Recuerda, si no estás seguro de Cómo identificar el tipo de soporte de papel higiénico, eche un vistazo de cerca a cómo está montado y si tiene tornillos visibles o mecanismos de liberación. En caso de duda, vaya lento y gentil, mejor para tomar un minuto extra que dañar su pared o soporte.
Recopilación de herramientas y materiales esenciales para la eliminación segura
Tener las herramientas correctas antes de comenzar su papel higiénico El proyecto de eliminación del titular puede ahorrar tiempo, evitar daños y hacer que todo el proceso sea más suave.
Antes Eliminar el soporte de papel higiénico accesorios, es crucial reunir todos los equipos necesarios. Estar preparado con adecuado Herramientas para la extracción del soporte de papel higiénico Ayudará a evitar los viajes de mediano proyecto a la ferretería y protegerá sus paredes de daños innecesarios.
Juntos de destornillador: eligiendo el tamaño y el tipo correcto (Phillips, Flathead, Allen)
El Mejor destornillador para eliminar papel higiénico tornillos para soportes depende de su accesorio. La mayoría de los soportes usan Phillips o tornillos de cabeza plana, mientras que algunos diseños modernos requieren llaves Allen. Un destornillador de múltiples bits con puntas magnéticas funciona mejor para evitar que los tornillos pequeños se pierdan durante la extracción.
Alicates y cuchillos de masilla: cómo usarlos para proteger las paredes
Los alicates de nariz de agujas ayudan a eliminar los tornillos tercos, mientras que un cuchillo de masilla sirve múltiples propósitos. Aprendiendo Cómo usar un cuchillo de masilla para quitar un soporte de papel higiénico correctamente puede evitar el daño de la pared – Deslízalo detrás del accesorio para romper los sellos de pintura antes de desenroscar.
Extractores de tornillos: cuándo y cómo usarlos para tornillos tirados
Para los tornillos despojados que no se moverán, un juego de extractores de tornillo puede ser un salvavidas. Estos bits revertos de tornillo dañados se apuñan cuando los métodos estándar fallan, evitando que tenga que perforar todo el accesorio.
Equipo de seguridad: la importancia de los guantes y la protección de los ojos
No pases por alto la seguridad al hacer Herramientas de reparación de baño de bricolaje trabajar. Los guantes protegen contra los bordes afilados, mientras que las gafas de seguridad evitan que el polvo o los escombros caigan en los ojos durante la extracción.
Kit de herramientas de eliminación del soporte del papel higiénico esencial
| Herramienta | Objetivo | Características especiales | Opciones alternativas | Notas de seguridad |
|---|---|---|---|---|
| Destornillador de múltiples bits | Elimina varios tipos de tornillos | La punta magnética evita tornillos perdidos | Destornilladores individuales | Esté atento a resbalar |
| Alicates de nariz aguja | Tornillos tirados de empuñaduras | Largo alcance para espacios apretados | Alicates de rumbo | Usar guantes |
| Espátula | Protege la superficie de la pared | Delgados de cuchilla se deslizan detrás del accesorio | Cuchillo de plástico | Vaya lento para evitar el enrollamiento |
| Juego de extractores de tornillo | Elimina los tornillos dañados | Diseño de hilo inversa | Método de banda de goma | Requiere una alineación cuidadosa |
| Gafas de seguridad | Protección para los ojos | Lentes anti-fog claros | Gafas regulares | Esencial para el trabajo de gastos generales |
Con estas herramientas reunidas de antemano, estará listo para abordar cualquier trabajo de eliminación del soporte de papel higiénico de manera eficiente. Recuerde que invertir en herramientas de calidad vale la pena – durarán proyectos futuros y facilitarán mucho el trabajo. Para aquellos que consideran una actualización después de la eliminación, muchos soportes modernos cuentan con sistemas de instalación sin herramientas que eliminan estas molestias para la próxima vez.
How to Remove a Toilet Paper Holder: Step-by-Step
“Eliminar un soporte de papel higiénico adecuadamente requiere paciencia y la técnica correcta para evitar el daño de la pared y garantizar un proceso de extracción limpio.”
Aprendiendo Cómo quitar un soporte de papel higiénico Correctamente puede salvarlo de reparaciones y frustraciones innecesarias de la pared. Ya sea que esté renovando o reemplazando, estos Pasos de eliminación del soporte de papel higiénico lo guiará a través del proceso de forma segura.
Paso 1: Localización y aflojamiento de tornillos o sujetadores
La mayoría de los soportes tienen tornillos visibles en los extremos o debajo de las tapas decorativas. Use el destornillador apropiado para aflojarlos. Para los tornillos ocultos, sienta suavemente alrededor de los bordes del soporte o busque pequeños orificios de acceso.
Paso 2: Guídate al tosente del soporte de la pared
Una vez que se retiran los tornillos, deslice un cuchillo de masilla detrás del accesorio para romper cualquier pintura o sellos de calafateo. Trabajar lentamente en todos los lados para eliminar un Soporte de papel higiénico de forma segura sin dañar la superficie de la pared.
Paso 3: Abordar tornillos ocultos y anclajes de pared
Si el titular no se mueve, verifique si hay sujetadores adicionales. Algunos modelos tienen anclajes ocultos que requieren una extracción cuidadosa. Para los anclajes obstinados, use alicates de nariz de agujas para torcerlos.
Paso 4: Limpiar el área y prepararse para reparaciones
Después de la extracción, limpie cualquier residuo adhesivo y llene agujeros de tornillo con Spackle. Este Guía paso a paso para eliminar un soporte de papel higiénico de la pared Asegura que las paredes de su baño permanezcan en perfectas condiciones para lo que venga después.
Lista de verificación de eliminación del titular de papel higiénico
| Paso | Herramientas necesarias | Estimación de tiempo | Nivel de dificultad | Desafíos potenciales |
|---|---|---|---|---|
| Localizar tornillos | Linterna, destornillador | 2-5 minutos | Fácil | Tornillos ocultos o pintados |
| Aflojar los sujetadores | Juego de destornillador | 3-7 minutos | Medio | Cabezales de tornillo |
| Titular | Cuchillo de masilla, alicates | 5-10 minutos | Medio | Enlaces adhesivos fuertes |
| Retire los anclajes | Alicates de nariz aguja | 2-8 minutos | Duro | Anclas rotas en la pared |
| Área limpia | Spackle, papel de lija | 5-15 minutos | Fácil | Grandes agujeros o daños |
Recuerda que Cómo eliminar un papel higiénico Titular sin causar daños Depende en gran medida de tomarse su tiempo y usar las herramientas adecuadas. Una vez eliminado, considere actualizar a un modelo más moderno o ecológico que pueda ofrecer una instalación y eliminación más fáciles en el futuro.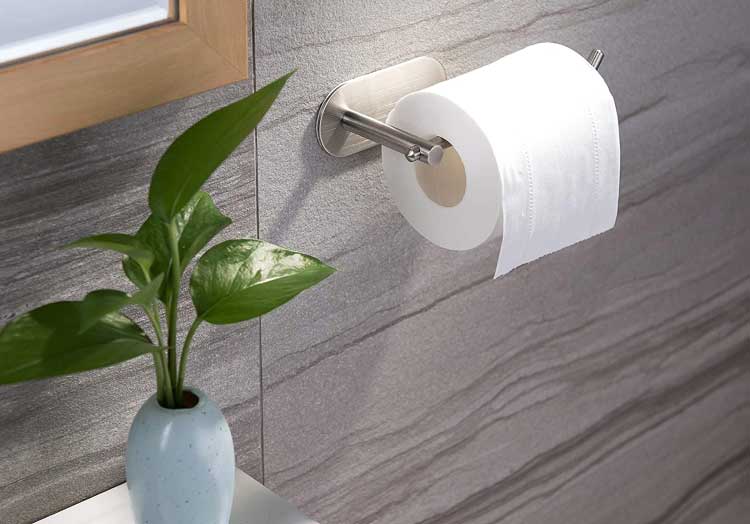
Solución de problemas de problemas comunes: tornillos pelados, óxido y anclajes tercos
“Incluso la eliminación del soporte del papel higiénico más sencillo puede golpear los inconvenientes – Estas técnicas probadas lo ayudarán a superar los obstáculos comunes sin dañar sus paredes.”
Cuando eliminación papel higiénico titular accesorios, puede encontrar problemas tercos que requieren técnicas especiales. Saber cómo manejar estos problemas puede significar la diferencia entre una eliminación suave y una experiencia frustrante.
Tratando con tornillos de ajuste tirados: técnicas de extractores de goma de goma y tornillo
Para Cómo eliminar un papel higiénico Tornillo de ajuste del soporte que está despojado, coloque una banda de goma gruesa sobre la cabeza del tornillo antes de aplicar su destornillador. El caucho llena los vacíos, proporcionando agarre. Para tornillos severamente despojados, use una broca de extractor de tornillo que se muerda en el metal a medida que gira en sentido antihorario.
Eliminar tornillos oxidados: aplicación de aceite y calor penetrante
El mejor Manera de quitar un papel higiénico oxidado Soporte de la pared implica paciencia y los productos correctos. Aplique aceite de penetración (como WD-40) y déjelo remojar durante 15 minutos. Para casos obstinados, calienta cuidadosamente el tornillo con un secador de pelo para expandir el metal antes de intentar la extracción.
Extracción de anclajes de pared tercos: usando alicates y apalancamiento
Cuando los anclajes no se muden, agarrarlos firmemente con alicates de nariz de agujas y torcerse mientras tiran suavemente. Si se rompen al ras con la pared, use una pequeña broca para crear un orificio piloto, luego inserte un tornillo ligeramente para sacar el ancla.
Prevención de problemas futuros: consejos para proteger nuevas instalaciones
Considere usar tornillos de acero inoxidable para nuevas instalaciones para evitar el óxido. Aplique una pequeña cantidad de gelatina de petróleo a las roscas de tornillo para facilitar la eliminación futura mientras evita la corrosión.
Problemas y soluciones de eliminación del soporte de papel higiénico común
| Problema | Herramientas necesarias | Solución | Se requiere tiempo | Sugerencia de prevención |
|---|---|---|---|---|
| Tornillos tirados | Banda de goma, extractor de tornillo | Use el caucho para agarrar o broca extractor | 5-15 minutos | Use destornilladores de calidad |
| Sujetadores oxidados | Aceite penetrante, fuente de calor | Remoje con aceite, aplique calor | 20-30 minutos | Use hardware de acero inoxidable |
| Anclajes atascados | Alicates, taladro pequeño | Gire o taladre con cuidado | 10-20 minutos | Instale los anclajes correctamente |
| Tornillos pintados | Cuchillo utilitario, destornillador | Puntuación alrededor de la cabeza del tornillo | 5-10 minutos | Máscara antes de pintar |
| Hardware roto | Taladro, alicates | Excelir restos | 15-30 minutos | No fuerce durante la instalación |
Recuerda que la mayoría tornillos tirados papel higiénico titular Los problemas se pueden resolver sin dañar sus paredes. Por particularmente difícil Retire un oxidado papel higiénico titular Situaciones, a veces es mejor trabajar lentamente en múltiples aplicaciones de petróleo penetrante en lugar de forzar el problema.
Reparación de daños en la pared y considerar reemplazos ecológicos
“La reparación adecuada de la pared y las opciones de reemplazo sostenible pueden transformar su baño al tiempo que minimiza el impacto ambiental.”
Después Completando su papel higiénico eliminación del titular, es probable que deba abordar cualquier resultado Reparación de la pared después de la extracción del soporte del papel higiénico. Este guía cubre tanto técnicas de reparación como sostenibles Opciones de actualización.
Relleno de agujeros y grietas: usando Spackle o Compuesto de articulación
Para Cómo reparar el daño de la pared después de quitar un soporte de papel higiénico, comience limpiando el área. Aplique Spackle con un cuchillo de masilla, agujeros ligeramente sobrecargadores para tener en cuenta la contracción. Para un mayor daño, use un compuesto de junta y una cinta de malla de fibra de vidrio.
Lijado y pintura: logrando un acabado sin costuras
Una vez seco, lije el área reparada suave con papel de lija de grano 120. Limpie el polvo, luego aplique la imprimación antes de pintar. Haga coincidir su pintura existente para obtener los mejores resultados – Tome un chip a su ferretería para una coincidencia de color.
Titulares de papel higiénico ecológico: materiales y beneficios
Considerar Tasco de papel higiénico ecológico Hecho de bambú, metal reciclado o madera de origen sostenible. Estos mejor papel higiénico ecológico Opciones de soporte para baños Ofrezca durabilidad al tiempo que reduce el impacto ambiental.
Tendencias de diseño modernas: opciones para actualizar los accesorios de su baño
Los diseños contemporáneos incluyen soportes flotantes minimalistas, unidades multifuncionales con almacenamiento y modelos sin contacto. Elija acabados que complementen el estilo de su baño mientras consideran los requisitos de mantenimiento.
Comparación de soporte de papel higiénico ecológico
| Material | Durabilidad | Mantenimiento | Costo | Beneficio ambiental |
|---|---|---|---|---|
| Bambú | Alto | Bajo | $$ | De rápido crecimiento, renovable |
| Aluminio reciclado | Muy alto | Ninguno | $$$ | Reduce el impacto minero |
| Madera sostenible | Medio | Engrasamiento regular | $$$ | Fuentes certificadas por FSC |
| Plástico reciclado | Alto | Ninguno | $ | Desvía los desechos de los vertederos |
| Cerámico | Muy alto | Ninguno | $$ | Larga vida útil, materiales naturales |
Al seleccionar nuevos accesorios, considere tanto la estética como la funcionalidad. Muchos modernos Tasco de papel higiénico ecológico Combine el diseño elegante con características prácticas como el almacenamiento de rollo de repuesto integrado o los mecanismos de fácil cambio de cambio.
Conclusión
Después de años en la industria del papel doméstico, he visto cómo una simple eliminación del soporte de papel higiénico puede convertirse en un “rasguño de la cabeza” Si no estás preparado. Pero con las herramientas y técnicas adecuadas, ya sea que se trata con tornillos obstinados, accesorios oxidados o porta de cerámica frágiles, es un proyecto de bricolaje que cualquiera puede abordar.
The key? Patience and the right approach. From identifying your holder type to repairing wall damage, each step matters. And if you’re upgrading, consider eco-friendly options—they’re not just better for the planet, but often easier to install and maintain long-term. Now that you’ve removed the old fixture, you might be planning a new setup for a commercial space. Choosing the right commercial toilet rolls and dispensers is key to efficiency and cost savings.
Al final del día, una eliminación suave significa una molestia menos en la actualización de su baño. Ahora que tienes los conocimientos, ¡es hora de agarrar tus herramientas y ponerse a trabajar!
Preguntas frecuentes
P1: ¿Cómo retiro un soporte de papel higiénico de la pared?
A1: Comience quitando el rollo de papel higiénico y la varilla para exponer los tornillos de montaje. Use el destornillador apropiado o la llave Allen para aflojar los tornillos, luego tire suavemente del soporte de la pared.
P2: ¿Qué herramientas necesito para quitar un soporte de papel higiénico?
A2: Por lo general, necesitará un destornillador (Phillips o Flathead) o una llave Allen. En algunos casos, un taladro eléctrico o alicates pueden ser útiles si los tornillos están apretados o despojados.
P3: ¿Cómo puedo quitar un soporte de papel higiénico empotrado sin dañar la pared?
A3: Para los soportes empotrados, ubique cuidadosamente y retire los tornillos ocultos. Apoye al soporte mientras lo desenrosca y usa técnicas de curiosidad suaves para evitar daños en la pared.
P4: ¿Qué debo hacer si el tornillo de ajuste en el soporte de papel higiénico está despojado?
A4: Intente colocar una banda de goma sobre el tornillo pelado para un agarre adicional mientras usa un destornillador. Alternativamente, use alicates o una herramienta de extractor de tornillo para quitar el tornillo de manera segura.
P5: ¿Puedo quitar un soporte de papel higiénico sin usar ninguna herramienta?
A5: Algunos modelos pueden permitir la extracción a mano si cuentan con un diseño simple, pero la mayoría están asegurados con tornillos que requieren al menos un destornillador básico o una llave Allen.
P6: ¿Por qué necesitaría quitar un soporte de papel higiénico?
A6: La eliminación puede ser necesaria para limpiar detrás de la unidad, reemplazarla con un nuevo modelo, reparar la superficie de montaje o actualizar la decoración de su baño.
P7: ¿Cómo aseguro la seguridad al quitar un soporte de papel higiénico?
A7: Asegúrese de utilizar las herramientas correctas, trabaje lentamente para evitar dañar la pared y usar guantes protectores. Verifique que no haya riesgos eléctricos cerca antes de comenzar.
P8: ¿Existe el riesgo de dañar la pared durante la extracción?
A8: Sí, si la eliminación se realiza con fuerza o sin herramientas adecuadas, existe el riesgo de dañar la pared. Siga las instrucciones paso a paso y use técnicas suaves para minimizar cualquier daño.
Enlaces externos
- Departamento de Vivienda y Desarrollo Urbano de EE. UU. – Página principal
- Comisión federal – Información del consumidor
- Extensión de la Universidad de Minnesota
- Extensión de la Universidad Estatal de Ohio
- Comisión de Seguridad de Productos del Consumidor de EE. UU.
- Asociación Nacional de Constructores de Cienadas
- Departamento de Energía de EE. UU. - Saver de energía
- Harvard Business Review
